
The kit
How it works
Every robot, from this one to a self-driving car, runs the same loop: sense something, decide something, do something. The kit makes that loop small enough to hold.
The loop
Sense, decide, act
- 01
Input
The sensor reads the environment
The distance sensor measures how far away the nearest thing in front of the robot is, many times a second. On its own that number means nothing. It is just a reading.
- 02
Logic
The controller runs the student’s program
The program decides what that number means. Closer than 15 centimetres? Stop and turn. This is where a student’s thinking becomes the robot’s behavior.
- 03
Output
The motors turn instructions into movement
The controller sends power to two wheels. Equal power drives straight, unequal power turns. Every movement the robot makes comes from this one mechanism.
- 04
Circuit
The wiring makes it inspectable
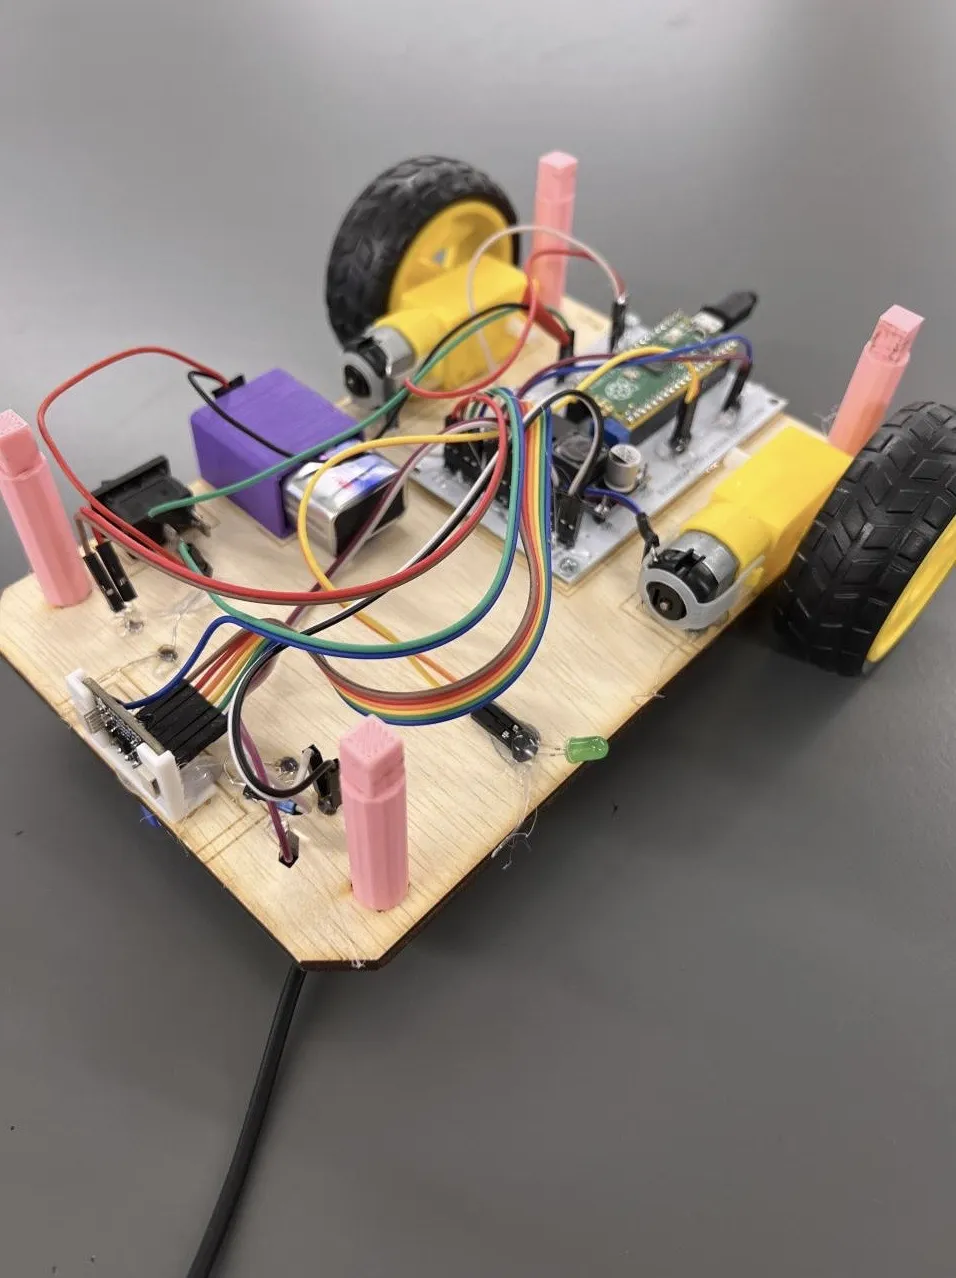
Connections are visible rather than sealed away, so when something does not work a student can trace the path and find the break instead of guessing.
- 05
Structure
The chassis holds the system together
A laser-cut base gives everything a fixed position. It also means a student can take one part off, change it, and put it back, which is what iteration requires.
Why nothing is hidden
It would be easier to ship the robot as a sealed unit. It would also be useless for teaching. When a wire is loose and the robot only turns left, a student who can see the wiring has a problem they can solve. A student holding a sealed box has a problem they can only report.
Almost every genuinely valuable moment in an Eaglets program happens when something stops working.
Underneath
Somebody drew this
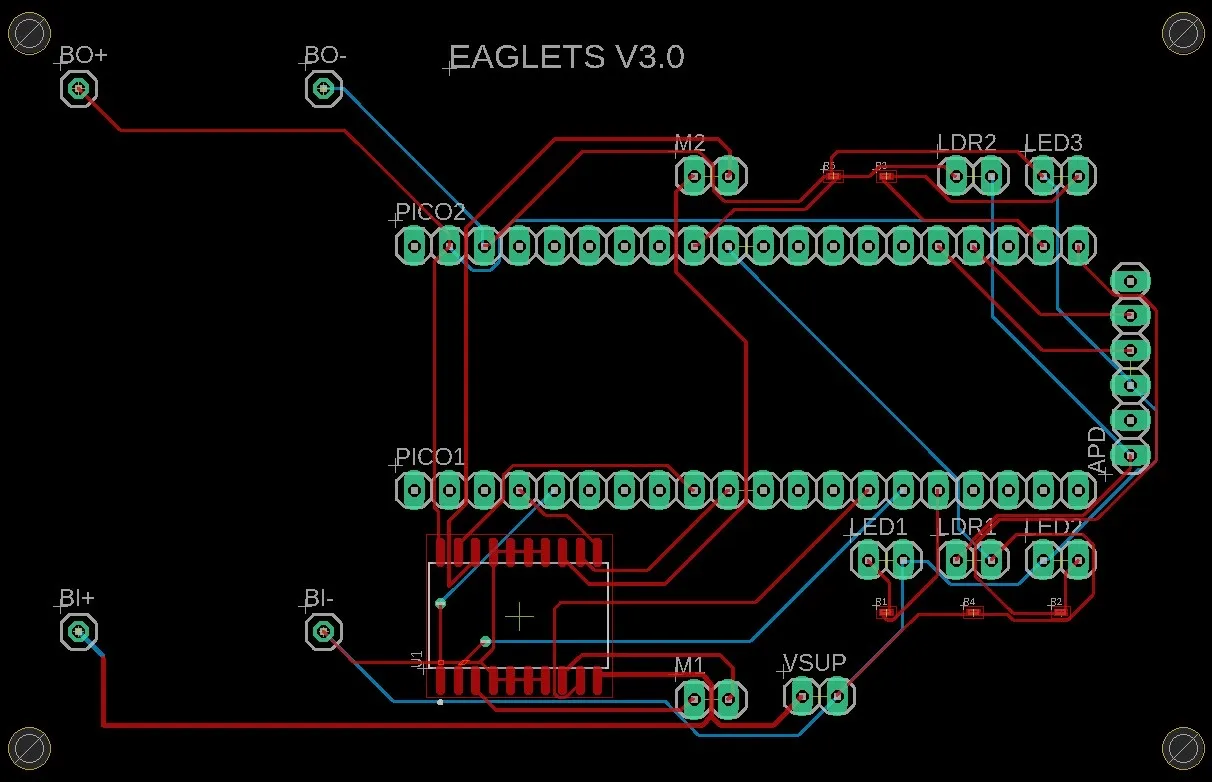
The board the components plug into was designed by students. This is its layout: the copper routing that carries power and signal between the controller, the motors, the indicator LEDs, and the light sensors.
It is worth pausing on what that means. A student decided where each track runs, checked that nothing crossed that should not, sent the files to be manufactured, and then found out whether it worked. Getting a board back that does not work is an expensive and instructive afternoon, and it is one of the reasons the technical officer roles here are not decorative.
Campers never see this file. They see the finished board, plug things into it, and get on with their programme, which is the point of doing the work properly.
Want to try it?
Setup guides and first programs live in the tutorials. Troubleshooting is organized by what went wrong, not by what chapter it is in.